If you're searching for the best Chicken Katsu Recipe with Katsu Sauce, you've come to the right place. This Japanese-style fried chicken cutlet is one of the most popular dishes in Japanese cuisine and has become a favorite around the world. Known for its crispy golden crust, tender chicken interior, and flavorful katsu sauce, this dish is perfect for weeknight dinners, family meals, meal prep, and special occasions.
Chicken katsu, also known as Japanese breaded chicken cutlet, is made by coating chicken breasts in flour, eggs, and panko breadcrumbs before frying until perfectly crispy. The cutlets are then sliced and served with a savory-sweet katsu sauce that complements the crunchy coating beautifully.
What Is Chicken Katsu?
Chicken Katsu is a traditional Japanese fried chicken cutlet made by coating chicken breast in flour, egg, and Japanese panko breadcrumbs before frying until crispy and golden. The word "Katsu" comes from the Japanese adaptation of the word "cutlet."
This Japanese chicken dish became popular because of its crunchy exterior, juicy interior, and versatility. Today, Chicken Katsu is served in Japanese restaurants worldwide and is commonly paired with curry rice, tonkatsu sauce, miso soup, or fresh cabbage salad.
Unlike traditional Southern fried chicken, Chicken Katsu uses panko breadcrumbs, which create a lighter and crispier texture. This unique coating makes the dish especially appealing to anyone who enjoys crunchy fried foods without a heavy batter.
Chicken Katsu vs Tonkatsu
Many people confuse Chicken Katsu and Tonkatsu.
The primary difference is the protein used.
Chicken Katsu uses chicken breast or chicken thighs.
Tonkatsu uses pork loin or pork cutlets.
Both dishes use the same breading process and are served with similar side dishes. If you enjoy one, you'll likely love the other.
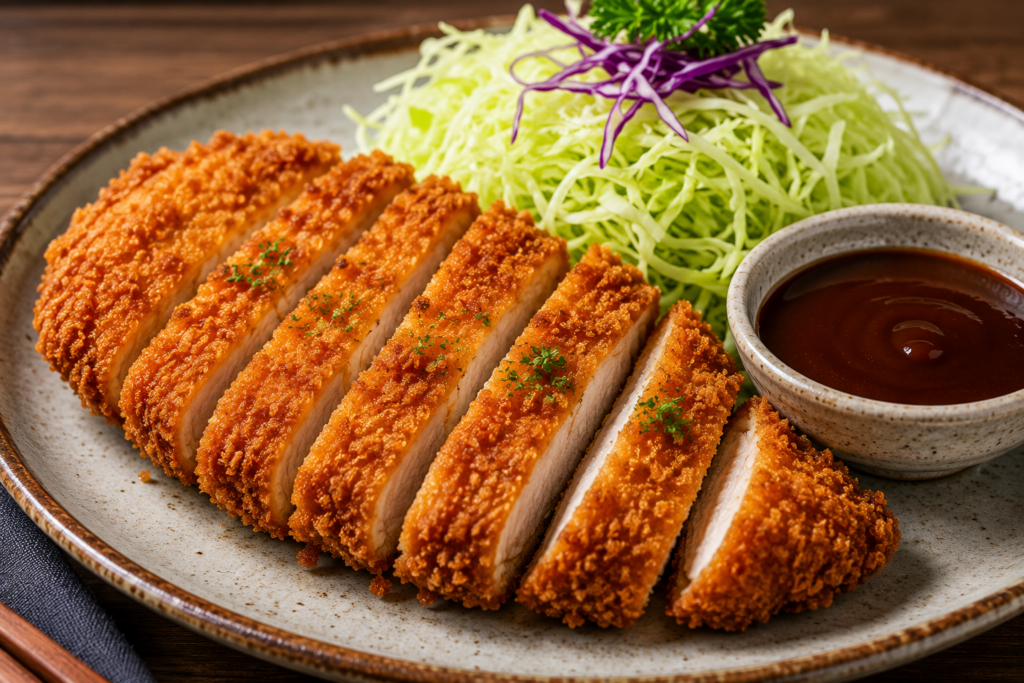
Crispy chicken katsu with Katsu sauce
Why You'll Love This Chicken Katsu Recipe
There are many reasons home cooks love this easy Chicken Katsu recipe:
Extra crispy texture from panko breadcrumbs
Juicy and tender chicken every time
Quick 30-minute dinner recipe
Family-friendly Japanese comfort food
Easy ingredients available in most grocery stores
Perfect for meal prep and lunch boxes
Great with rice, noodles, or curry
If you're searching for authentic Japanese Chicken Katsu, crispy panko chicken cutlets, or homemade Japanese fried chicken, this recipe checks all the boxes.
Ingredients For Chicken Katsu & Katsu Sauce
Chicken Breast
Boneless, skinless chicken breast is the star ingredient in this Chicken Katsu recipe. It provides a lean source of protein and becomes incredibly tender when pounded to an even thickness before cooking. Chicken breast cooks quickly and develops a juicy interior that contrasts perfectly with the crispy panko coating.
Panko Breadcrumbs
Panko breadcrumbs are a Japanese-style breadcrumb known for their light, airy texture. Unlike traditional breadcrumbs, panko creates a crispier and crunchier coating that stays crispy longer after frying. This ingredient is essential for achieving authentic restaurant-style chicken katsu.
All-Purpose Flour
All-purpose flour serves as the first layer in the breading process. It helps the beaten egg adhere to the chicken, ensuring the panko breadcrumbs stick evenly to the surface. This simple ingredient plays an important role in creating a uniform and crispy crust.
Eggs
Eggs act as a binding agent between the flour and panko breadcrumbs. They help create a secure coating that stays attached during frying. Eggs also contribute to the beautiful golden-brown color and crispy texture of the finished chicken katsu.
Vegetable Oil
Vegetable oil is used for frying the chicken until golden and crispy. Oils with a high smoke point, such as canola, sunflower, or peanut oil, work best because they maintain a stable temperature and produce a light, non-greasy result.
Ketchup
Ketchup forms the base of the homemade katsu sauce. It provides sweetness, tanginess, and a rich tomato flavor that balances the savory elements of the sauce. This ingredient gives katsu sauce its signature taste and glossy texture.
Worcestershire Sauce
Worcestershire sauce adds depth and umami to the katsu sauce. Made from a blend of vinegar, spices, and seasonings, it contributes a slightly tangy and savory flavor that enhances the overall complexity of the sauce.
Soy Sauce
Soy sauce brings a salty, savory richness to the homemade katsu sauce. It helps balance the sweetness of the ketchup and brown sugar while adding the authentic Japanese-inspired flavor that makes the sauce so delicious.
Brown Sugar
Brown sugar adds a subtle sweetness and mild caramel flavor to the katsu sauce. It helps create the perfect balance between sweet, tangy, and savory notes, making the sauce rich and flavorful without being overpowering.
Dijon Mustard
Dijon mustard contributes a gentle tang and slight sharpness to the katsu sauce. It enhances the flavor profile by adding complexity and helping blend all the sauce ingredients into a smooth, well-rounded condiment
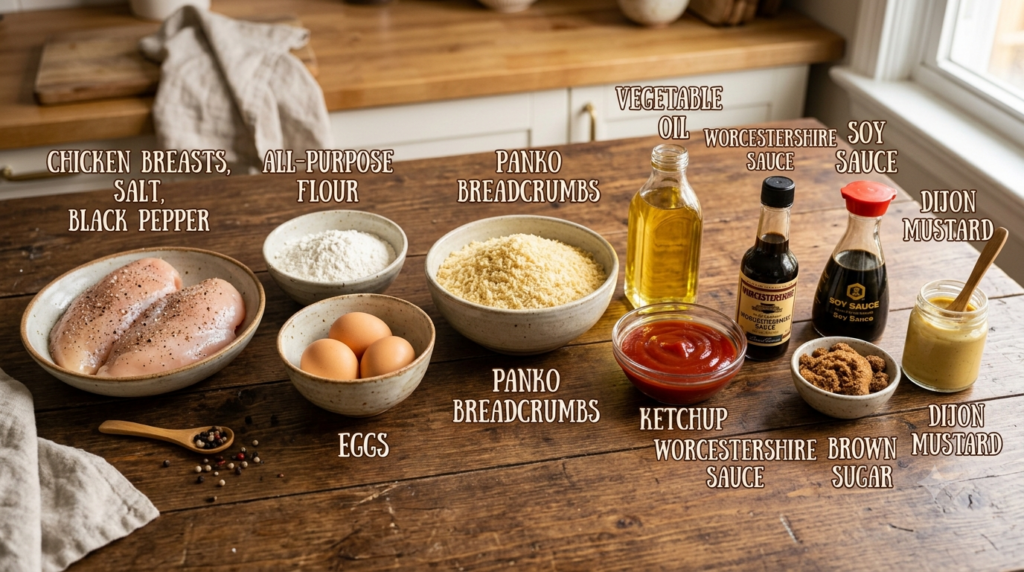
A complete lineup of everything you need to make our signature Crispy Chicken Katsu with Homemade Sauce, clearly labeled for your convenience.
Choosing the Best Chicken for Chicken Katsu
Boneless, skinless chicken breasts are the most common choice for chicken katsu. They become tender when pounded to an even thickness and cook quickly while maintaining juiciness.
You can also use:
Chicken thighs for extra flavor
Thin chicken cutlets
Chicken tenderloins
Butterfly-cut chicken breasts
For the best results, pound the chicken to approximately ½-inch thickness before breading.
USA & Europe Ingredient Substitutions
Original Ingredient
Substitute
Panko Breadcrumbs
Italian panko or crushed cornflakes
Worcestershire Sauce
Steak sauce
Brown Sugar
Honey or maple syrup
Dijon Mustard
Yellow mustard
Chicken Breast
Turkey cutlets
How to Make Restaurant-Style Chicken Katsu
Step 1: Prepare the Chicken
Place the chicken breasts on a cutting board and, if they are very thick, carefully slice them horizontally to create thinner cutlets. Cover the chicken with plastic wrap and gently pound it using a meat mallet or rolling pin until it reaches an even thickness of about ½ inch (1.25 cm). This helps the chicken cook evenly and remain tender.
Step 2: Season the Chicken
Pat the chicken dry with paper towels to remove excess moisture. Season both sides evenly with salt and black pepper. Let the chicken rest for 5 minutes so the seasoning can penetrate the meat and enhance its flavor.
Step 3: Set Up the Breading Station
Prepare three shallow bowls:
Bowl 1: Add the all-purpose flour.
Bowl 2: Beat the eggs until smooth.
Bowl 3: Add the panko breadcrumbs.
Arrange the bowls in order to create an efficient breading station.
Step 4: Coat the Chicken with Flour
Take one chicken cutlet and lightly coat it in the flour. Shake off any excess flour to prevent the coating from becoming too thick. The flour creates a dry surface that helps the egg adhere properly.
Step 5: Dip in the Egg Mixture
Transfer the floured chicken into the beaten eggs. Turn it several times to ensure every part is coated evenly. Allow any excess egg to drip off before moving to the next step.
Step 6: Cover with Panko Breadcrumbs
Place the chicken into the bowl of panko breadcrumbs. Press the breadcrumbs firmly onto both sides of the chicken to create a thick, even coating. Ensure there are no bare spots. Repeat the breading process with the remaining chicken pieces.
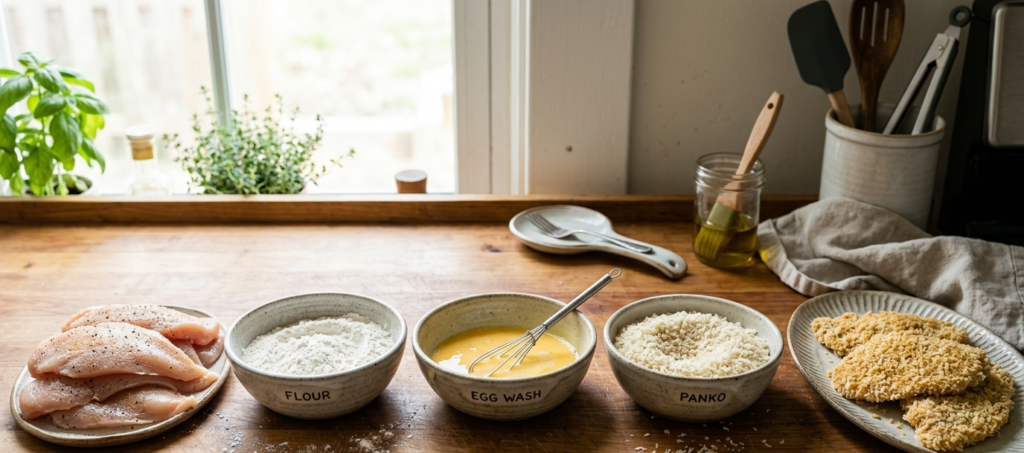
The ultimate three-step dipping station for achieving a perfectly crispy coating: dredged in flour, dipped in egg, and blanketed in flaky panko breadcrumbs.
Step 7: Heat the Oil
Pour about 1 inch (2.5 cm) of vegetable oil into a large skillet or deep frying pan. Heat the oil over medium heat until it reaches 350°F (175°C). If you do not have a thermometer, drop a few panko crumbs into the oil; they should sizzle immediately and float to the surface.
Step 8: Fry the Chicken
Carefully place the breaded chicken into the hot oil without overcrowding the pan. Fry for approximately 3–4 minutes on one side until golden brown and crispy. Flip gently and cook the other side for another 3–4 minutes until the chicken is fully cooked and reaches an internal temperature of 165°F (74°C).
Step 9: Drain and Rest
Remove the cooked chicken from the oil and place it on a wire rack set over a baking sheet. This keeps the coating crispy by allowing excess oil to drain away. Let the chicken rest for 3–5 minutes before slicing.
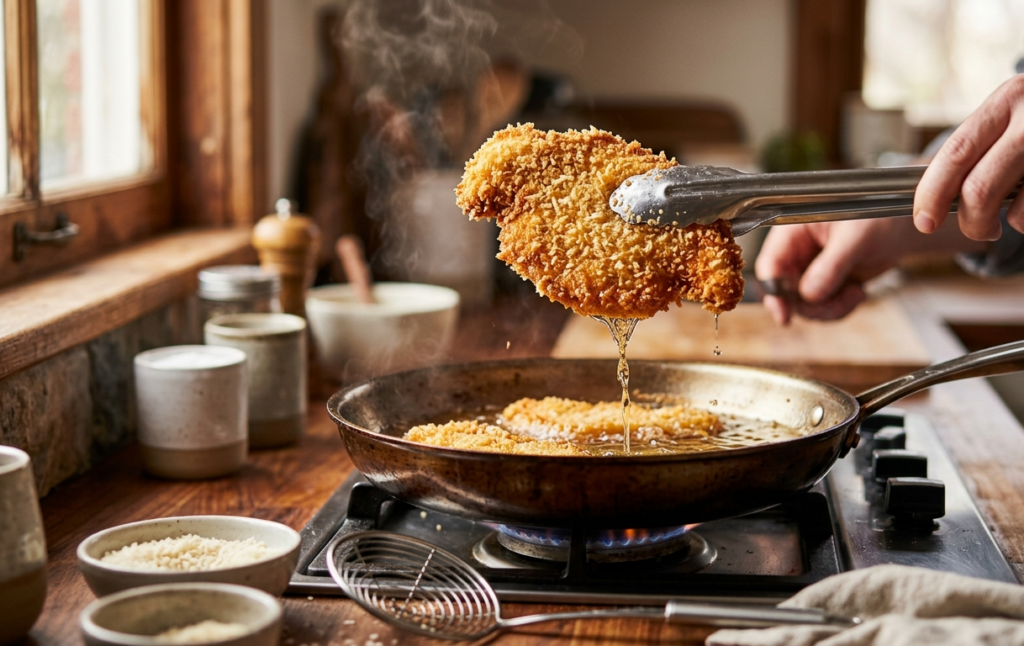
shaking off excess oil from a golden crispy chicken katsu
Step 10: Make the Katsu Sauce
In a small bowl, combine:
3 tablespoons ketchup
2 tablespoons Worcestershire sauce
1 tablespoon soy sauce
1 tablespoon brown sugar
1 teaspoon Dijon mustard
Whisk until smooth and well blended. Taste and adjust sweetness or tanginess if desired.
Step 11: Slice the Chicken
Using a sharp knife, slice the chicken katsu into ½-inch strips. Cutting after resting helps retain the juices and creates an attractive presentation.
Step 12: Serve and Enjoy
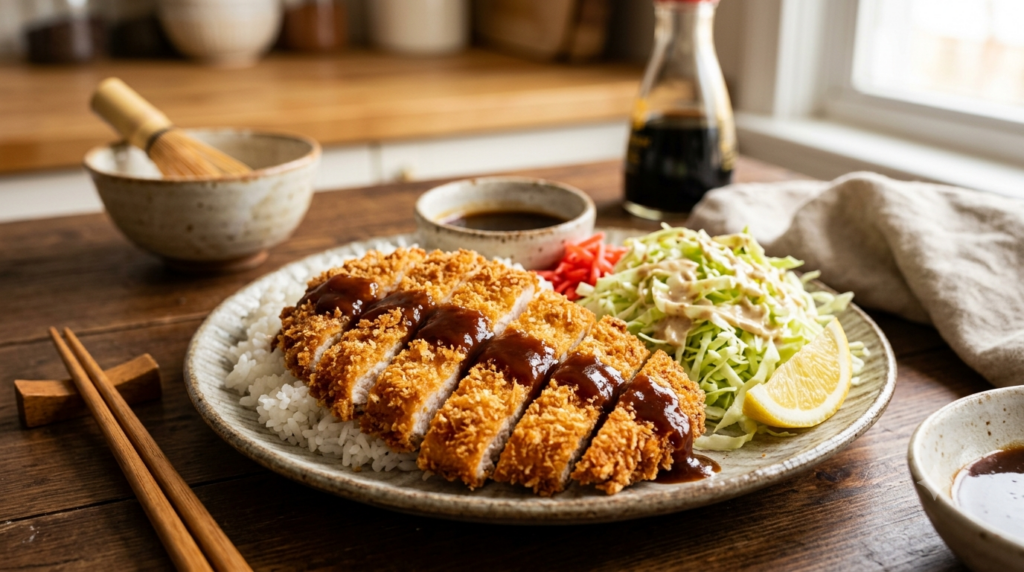
Arrange the sliced chicken katsu on a serving plate. Drizzle with homemade katsu sauce or serve the sauce on the side for dipping. Pair with steamed Japanese rice, shredded cabbage, miso soup, or a fresh salad for a complete Japanese-inspired meal.
Air Fryer Chicken Katsu Option
For a healthier version, you can make Air Fryer Chicken Katsu.
Simply spray the breaded chicken lightly with cooking oil and air fry at 400°F (200°C) for 12–15 minutes, flipping halfway through cooking.
This method significantly reduces oil while still producing a crunchy exterior.
What to serve with Chicken Katsu
Chicken katsu can be served in several delicious ways:
Traditional Japanese Style: Serve sliced chicken katsu over steamed white rice with shredded cabbage and katsu sauce.
Chicken Katsu Curry: Top crispy chicken katsu with Japanese curry sauce and serve over rice.
Chicken Katsu Bowl: Arrange sliced katsu over rice and add vegetables, pickled ginger, and green onions.
Chicken Katsu Sandwich: Place crispy chicken cutlets between slices of soft bread with cabbage and sauce.
Healthy Option: Serve alongside a fresh Asian slaw and steamed vegetables.
The Secret to Crispy Chicken Katsu
Many home cooks wonder how restaurants achieve such crispy chicken katsu. The answer comes down to a few important techniques:
First, use authentic panko breadcrumbs instead of regular breadcrumbs. Panko creates more air pockets and a crunchier coating.
Second, maintain the frying oil temperature at 350°F (175°C). Oil that is too cool will make the coating greasy, while overly hot oil can burn the breadcrumbs.
Third, avoid overcrowding the frying pan. Cook the cutlets in batches to maintain consistent oil temperature.
Finally, place fried cutlets on a wire rack rather than paper towels. This prevents steam from softening the crispy coating.
Storage Tips
Refrigerate in airtight container for up to 3 days.
Store sauce separately.
Freeze cooked cutlets up to 2 months.
Cool completely before storing.
Reheating Tips
Air Fryer
350°F (175°C) for 4–5 minutes.
Oven
375°F (190°C) for 10 minutes.
Avoid
Microwave reheating if possible, as it softens the crispy coating.
Conclusion
Chicken Katsu with Katsu Sauce is a delicious Japanese comfort food that combines a crispy golden panko coating with juicy, tender chicken and a rich, savory-sweet sauce. Simple ingredients and easy preparation make this recipe perfect for both busy weeknights and special family dinners. Whether served with steamed rice, shredded cabbage, or Japanese curry, this homemade Chicken Katsu delivers authentic restaurant-quality flavor in every bite. Once you try this crunchy, flavorful Japanese classic, it is sure to become a regular favorite in your Asian recipe collection.
We Want to Hear From You!
Did you stick to the classic chicken breast cutlet, or did you substitute juicy chicken thighs? Did you whip up the katsu sauce from scratch or try out one of our Western grocery store ingredient swaps?
Drop a comment down below and leave us a 5-star rating if you loved this recipe! Don’t forget to snap a photo of your golden-brown creations and tag us on social media using the hashtag #AsianCuisineRecipes. Happy cooking!
Bring the classic Japanese diner experience home with this authentic, ultra-crispy Chicken Katsu (Tori Katsu). Tender, thinly pounded chicken breasts are coated in flaky panko breadcrumbs, fried to a magnificent crunch, and drizzled with a quick, umami-rich homemade tonkatsu sauce. A fast, family-favorite weeknight dinner!
For the Chicken Katsu
2large boneless skinless chicken breasts
1/2tbsp salt
1/2tbsp black pepper
1/2cup all-purpose flour
2large egg (beaten)
1 1/2cup panko breadcrumbs
vegetable oil (for frying)
For the Katsu Sauce
3tbsp ketchup
2tbsp Worcestershire sauce
1tbsp soy sauce
1tbsp brown sugar
1tbsp Dijon mustard
Instructions
1
Step 1:Pound chicken breasts to an even ½-inch thickness.
2
Step 2:Season both sides with salt and pepper.
3
Step 3:Prepare three bowls:
4
Flour
5
Beaten eggs
6
Panko breadcrumbs
7
Step 4:Coat chicken in flour.
8
Step 5:Dip into beaten eggs.
9
Step 6:Press firmly into panko breadcrumbs.
10
Step 7:Heat oil to 350°F (175°C).
11
Step 8:Fry chicken for 3–4 minutes per side until golden brown.
12
Step 9:Transfer to a wire rack.
13
Step 10:Mix all katsu sauce ingredients in a small bowl.
14
Step 11:Slice chicken and drizzle with sauce before serving.
Nutrition Facts
Servings 4
Amount Per Serving
Calories520kcal
% Daily Value *
Total Fat27g42%
Saturated Fat5g25%
Sodium780mg33%
Total Carbohydrate31g11%
Dietary Fiber2g8%
Sugars7g
Protein36g72%
* Percent Daily Values are based on a 2,000 calorie diet. Your daily value may be higher or lower depending on your calorie needs.
Note
For the juiciest chicken katsu, pound the chicken breasts to an even ½-inch thickness before breading.
Use authentic Japanese panko breadcrumbs for the lightest and crispiest coating.
Pat the chicken dry before seasoning to help the breading adhere better.
Do not skip the flour layer, as it helps the egg and panko stick evenly to the chicken.
Maintain the oil temperature at 350°F (175°C) throughout frying for a perfectly golden and crispy crust.
Avoid overcrowding the pan, as this lowers the oil temperature and can make the coating greasy.
Place the fried chicken on a wire rack instead of paper towels to keep it crispy.
Let the chicken rest for 3–5 minutes before slicing to retain its juices.
Homemade katsu sauce can be prepared up to 3 days in advance and stored in the refrigerator. For extra flavor, serve with finely shredded cabbage, steamed Japanese rice, and pickled vegetables.
An air fryer can be used for a lighter version; cook at 400°F (200°C) for 12–15 minutes, flipping halfway through.
Keywords:
chicken Katsu Recipe, Japanese Chicken Katsu, Crispy Chicken Katsu, Homemade Chicken Katsu, c Panko Crusted Chicken, Chicken Katsu Curry, Easy Chicken Katsu Recipe, Authentic Chicken Katsu, Restaurant Style Chicken Katsu, Japanese Comfort Food, Crunchy Chicken Cutlet, Japanese Chicken Dinner, Crispy Panko Chicken, Chicken Katsu with Tonkatsu Sauce
Pin this recipe to share with your friends and followers.
Samantha Doe
Food and Lifestyle Blogger
Hi, I'm Samantha, a full-time food blogger, mother of 2 beautiful daughters and a lovely wife. I live in New Jersey with my family. Loves traveling, sharing new recipes, and spending time with my family.