
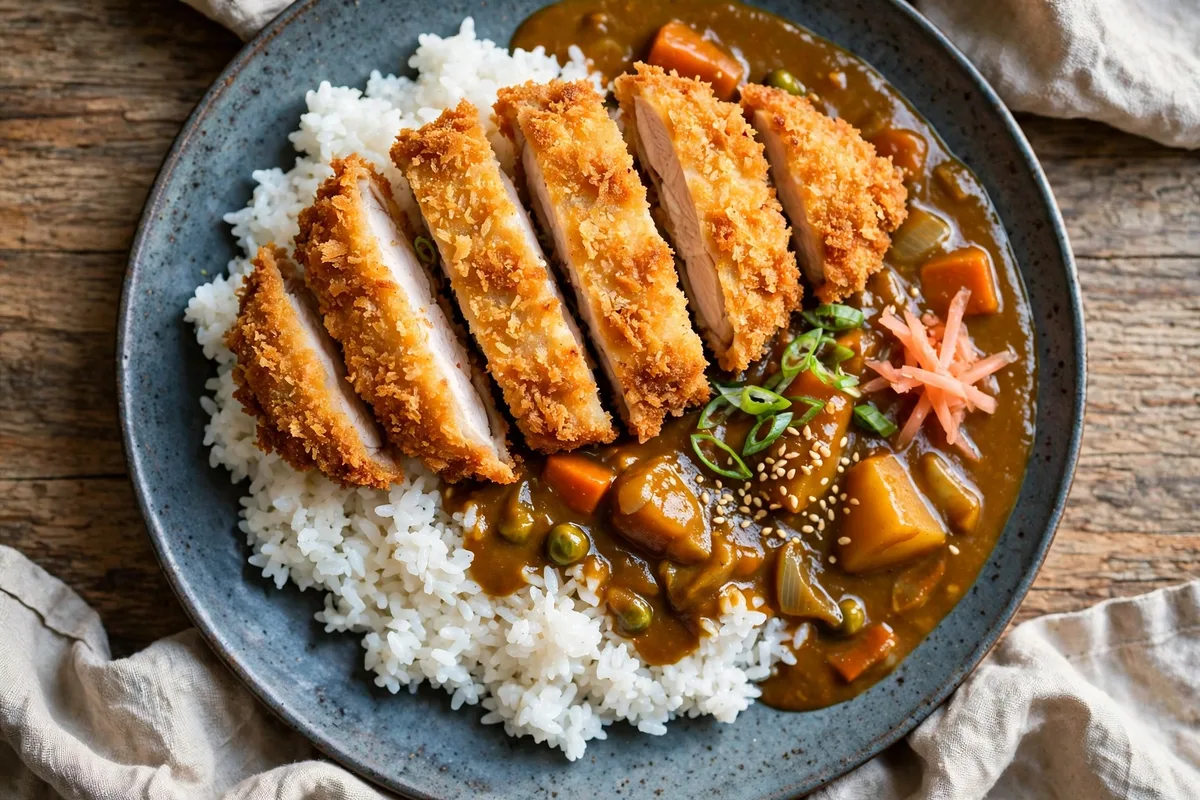
Chicken katsu curry is the kind of dinner that feels like a treat without needing a special occasion: crisp, golden panko-coated chicken, sliced and laid over rice, with a smooth, mildly spiced curry sauce spooned over the top. The contrast is the whole point — crunchy coating, tender chicken inside, and a warm, savory sauce that ties the plate together.
This easy version keeps the method approachable. The chicken is pounded to an even thickness so it cooks evenly, the curry sauce is a simple flour-and-curry-powder roux loosened with stock, and everything comes together in about 40 minutes. No deep-fryer is needed — a shallow pan of oil does the job.
What is chicken katsu curry?
Chicken katsu curry, or katsu karē, is a Japanese dish of breaded, fried chicken cutlet (katsu) served with Japanese curry sauce and usually steamed rice. “Katsu” is short for katsuretsu, a breaded cutlet, and Japanese curry is notably milder and sweeter than Thai or Indian curries, thickened with a roux and seasoned with curry powder, soy sauce, and often a little honey or apple for sweetness.
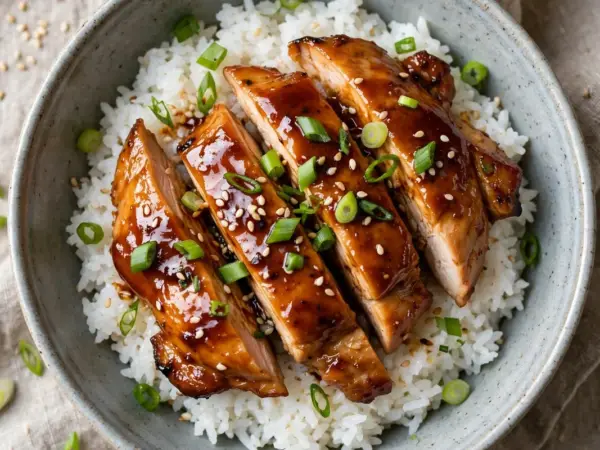
It is different from Chicken Teriyaki Rice Bowl, already published on this site. Teriyaki is a glazed, pan-fried chicken in a sweet soy sauce; katsu curry is breaded and fried, and its defining flavor is the curry sauce, not a glaze. It is also different from Butter Chicken, which is an Indian tomato-and-cream curry — the sauces share the word “curry” but not the flavor, thickness, or method.
Why you’ll love this recipe
- Crisp coating that stays crisp. Pounding the chicken evenly, and resting the breaded cutlets briefly before frying, helps the panko stay put.
- A curry sauce from pantry staples. Onion, carrot, curry powder, flour, and stock make a smooth sauce — no curry block or special paste required.
- A complete plate in one recipe. Rice, chicken, and sauce are all covered, with pickled ginger or a simple salad as the only optional extra.
- Weeknight-friendly comfort food. About 40 minutes from start to finish, with most of the time hands-off while the sauce simmers.
Ingredients you’ll need
Exact quantities are also given in the recipe card at the end of this article.
- Chicken: 4 boneless, skinless chicken breasts (about 600 g total), pounded to about 1 cm even thickness. Even thickness is what keeps the chicken juicy rather than dry at the edges.
- Flour for coating: 1/2 cup (60 g) all-purpose flour, seasoned with 1/2 teaspoon salt and 1/4 teaspoon black pepper.
- Eggs for coating: 2 large eggs, beaten.
- Panko: 2 cups (about 100 g) panko breadcrumbs. Panko gives a lighter, crisper crust than fine breadcrumbs.
- Oil for frying: About 1 cup (240 ml) neutral oil, such as vegetable or sunflower oil, for shallow frying.
- Rice: 2 cups (400 g) uncooked short-grain or jasmine rice, cooked to serve 4.
- Onion and carrot for the sauce: 1 onion, finely diced, and 1 medium carrot, finely diced.
- Garlic and ginger: 2 cloves garlic, minced, and 1 tablespoon grated fresh ginger.
- Curry powder: 3 tablespoons mild curry powder.
- Flour for the roux: 3 tablespoons all-purpose flour.
- Stock: 3 cups (720 ml) chicken stock.
- Soy sauce and honey: 2 tablespoons (30 ml) soy sauce and 1 tablespoon honey, or to taste.
- Optional garnish: Sliced scallions (spring onions), and pickled ginger if you like.
Substitutions in brief
For a gluten-free version, use gluten-free flour and gluten-free panko and check the soy sauce and curry powder labels. Chicken thighs, pounded evenly, also work and stay very juicy — cook them until they reach 165°F (74°C) throughout, with no pink meat remaining.
How to make chicken katsu curry
Step 1: Make the curry sauce base
Heat 1 tablespoon of the neutral oil in a saucepan over medium heat. Cook the onion and carrot for 5 minutes, until softened. Add the garlic and ginger and cook for 1 minute more, until fragrant.
Step 2: Build the roux and sauce
Stir in the curry powder and the 3 tablespoons of flour and cook for 1 minute, stirring constantly, so the flour loses its raw taste. Pour in the stock a little at a time, stirring to keep the sauce smooth. Add the soy sauce and honey, bring to a gentle simmer, and cook for 8 to 10 minutes, stirring occasionally, until thick enough to coat a spoon. Taste and adjust with a little more soy sauce or honey. Keep warm on low heat.
Step 3: Bread the chicken
Set up three shallow dishes: seasoned flour, beaten eggs, and panko. Pat the pounded chicken dry. Coat each piece in flour, shaking off the excess, then in egg, then press firmly into the panko so the coating sticks. Rest the breaded cutlets on a plate for 5 minutes — this helps the coating stay on in the pan.
Step 4: Fry the katsu
Heat the remaining oil in a large skillet over medium-high heat until shimmering. Do not leave hot oil unattended. Fry the cutlets in batches, without crowding the pan, for 4 to 5 minutes per side, until deep golden and crisp. Chicken must reach 165°F (74°C) throughout, with no pink meat remaining. Drain on a wire rack or paper towels, and let rest for 2 minutes before slicing — slicing straight away lets the juices run out.
Step 5: Serve
Divide the cooked rice between four plates or bowls. Slice each cutlet into strips and lay them over the rice. Spoon the warm curry sauce over the chicken and rice, leaving some of the crisp coating visible. Scatter with scallions and add pickled ginger alongside if you like. Serve immediately, while the coating is still crisp.
Tips for the best chicken katsu curry
- Pound to an even thickness. A chicken breast is thick at one end and thin at the other; pounding it to about 1 cm means it cooks through at the same rate and stays juicy.
- Do not crowd the frying pan. Crowding drops the oil temperature and makes the coating soggy. Fry in batches and keep the first batch warm on a rack in a low oven if needed.
- Let the sauce simmer, not boil hard. A gentle simmer thickens the roux sauce smoothly; vigorous boiling can make it splutter and turn grainy.
- Slice after resting. Two minutes of rest keeps the chicken juicy and the coating intact when you slice.
- Keep sauce and coating separate until serving. Spooning the sauce over at the last moment is what keeps the contrast between crisp and saucy.
Substitutions and variations
- Gluten-free: Use gluten-free flour, gluten-free panko, and tamari or certified gluten-free soy sauce, and check the curry powder label.
- Milder: Use a mild curry powder and leave out any chili; a little extra honey softens the spice further.
- Spicier: Add 1/2 teaspoon chili flakes or a pinch of cayenne to the sauce, and taste before adding more.
- Chicken thighs: Boneless, skinless thighs, pounded evenly, are juicier and more forgiving than breast. Cook to 165°F (74°C) throughout.
- Baked option: Spray the breaded cutlets generously with oil and bake at 200°C (400°F) for 20 to 25 minutes, turning once, until golden and cooked through. The coating will be less crisp than fried, but still good.
What to serve with chicken katsu curry
Katsu curry with rice is a complete main course. A simple shredded cabbage salad, pickled ginger, or cucumber slices add freshness and crunch against the rich sauce.
Chicken Teriyaki Rice Bowl makes a useful lighter Japanese rice-bowl option another night, while Butter Chicken offers a creamy Indian curry contrast. For a Thai curry comparison, Thai Green Curry Chicken shows how a coconut-milk curry differs from this roux-thickened Japanese sauce.
Storage, freezing, and reheating
- Refrigerate: Cool leftovers within 2 hours and refrigerate promptly in an airtight container. Eat within 2 days. Store sauce, chicken, and rice separately where possible, so the coating does not go soggy.
- Freeze: The curry sauce alone freezes well for up to 1 month. Fried katsu does not freeze as well, since the coating softens on thawing; freeze only if needed, and reheat in the oven.
- Reheat: Reheat only once. Reheat sauce in a saucepan until steaming hot throughout, adding a splash of stock if it has thickened. Reheat chicken in a hot oven until crisp and steaming hot throughout, rather than in the microwave, which softens the coating. Note that the crisp coating softens on reheating, even in the oven.
Final thoughts
Chicken katsu curry earns its place as a comfort-food favorite because it balances three simple things well: crisp chicken, fluffy rice, and a smooth, mildly spiced sauce that you can make from pantry staples.
If you make it, leave a rating and tell us how you served it — with pickled ginger, a cabbage salad, or just as it is. And if you enjoy this Japanese comfort dish, try Chicken Teriyaki Rice Bowl next for a lighter, glazed-chicken contrast.

Leave a review